Mushroom cultivation can feel like magic—until contamination ruins everything overnight. One invisible mistake can wipe out weeks of effort. That’s why Mushroom Sterilization isn’t just a step—it’s the backbone of successful growing. Whether you’re a beginner or scaling your setup, mastering sterilization can dramatically boost your yields, reduce losses, and give you consistent, high-quality results. Let’s break it down into simple, actionable steps you can trust.
Why Mushroom Sterilization Is Crucial for Success
What Happens Without Proper Sterilization?
When substrates aren’t sterilized correctly, harmful microorganisms compete with mushroom mycelium. This leads to:
- Slow or stalled growth
- Contamination (green mold, bacteria, etc.)
- Complete crop failure
Even a tiny lapse in sterilization can invite contamination.
Key Benefits of Proper Sterilization
Using the right mushroom substrate sterilization methods offers clear advantages:
- Higher yield and faster colonization
- Reduced contamination risks
- Better consistency across batches
- Healthier and stronger mycelium
Sterilization vs Pasteurization
It’s important to understand the difference:
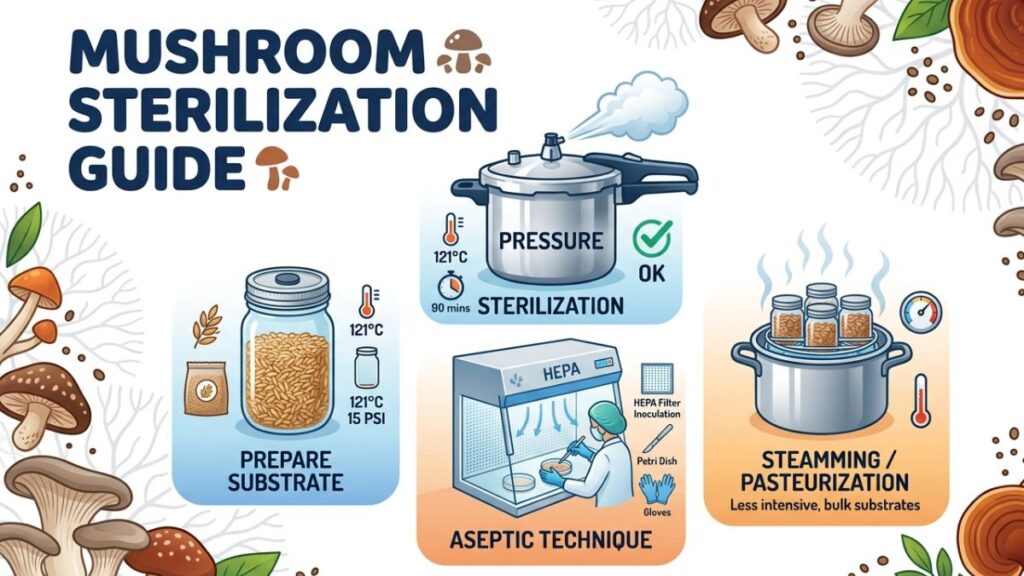
- Sterilization: Kills all microorganisms (ideal for grain spawn)
- Pasteurization: Reduces harmful microbes but keeps beneficial ones (used for bulk substrates)
Choosing the right approach depends on your growing method.
Step-by-Step Mushroom Sterilization Process
Step 1: Prepare Your Substrate
Start by selecting and preparing your substrate:
- Common options: straw, sawdust, coco coir, grains
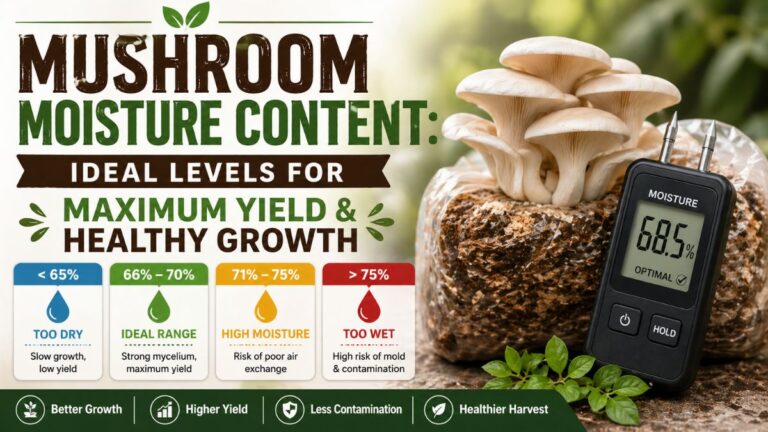
- Adjust moisture to optimal levels (not too wet or dry)
This step is essential for effective how to sterilize mushroom substrate at home.
Step 2: Load Containers Properly
Use appropriate containers:
- Glass jars or autoclavable bags
- Avoid overpacking—leave space for steam circulation
Step 3: Apply Heat Sterilization
The most reliable best way to sterilize mushroom grain spawn is using pressure:
- Use a pressure cooker at 15 PSI
- Maintain temperature (~121°C) for 60–120 minutes
Alternative methods include:
- Steam sterilization (less effective but useful for beginners)
- Chemical sterilization (rarely recommended for home growers)
Step 4: Cool Down Safely
After sterilization:
- Let containers cool completely before inoculation
- Avoid exposing them to open air
This is a critical part of pressure cooker mushroom sterilization guide practices.
Step 5: Maintain Sterile Environment
During inoculation:
- Work in a clean area
- Use gloves, masks, and sanitized tools
- Consider using a still air box or laminar flow hood
Tips, Mistakes, and Safety Practices
Expert Tips for Better Results
To improve your sterilization success:
- Always monitor pressure and time accurately
- Use distilled or clean water
- Label batches for tracking
Common Mistakes to Avoid
Avoid these frequent errors:
- Under-sterilizing (too little time or pressure)
- Overloading the pressure cooker
- Opening containers too early
- Ignoring hygiene during inoculation
These mistakes often lead to contamination, even if everything else is done right.
Safety Precautions You Must Follow
Working with heat and pressure requires caution:
- Never open a pressure cooker while pressurized
- Check seals and valves before use
- Keep children and pets away from the workspace
- Use heat-resistant gloves
Safety is just as important as technique.
FAQs
1. How long should I sterilize mushroom substrate?
Typically 60–120 minutes at 15 PSI, depending on the substrate type and volume.
2. Can I sterilize without a pressure cooker?
Yes, but results may vary. Steam sterilization works, though it’s less effective than pressure cooking.
3. What’s the most common cause of contamination?
Improper sterilization and poor hygiene during inoculation are the biggest culprits.
Make Your Process Easier
To simplify your workflow and get accurate sterilization timing, try this helpful tool:
👉 https://mushroomcalculators.com/tool/mushroom-sterilization-calculator/
It takes the guesswork out of your process and helps you avoid costly mistakes.
Conclusion:
Mastering Mushroom Sterilization is the difference between frustration and flourishing results. With the right techniques, tools, and attention to detail, you can eliminate contamination risks and unlock consistent, high-yield harvests.