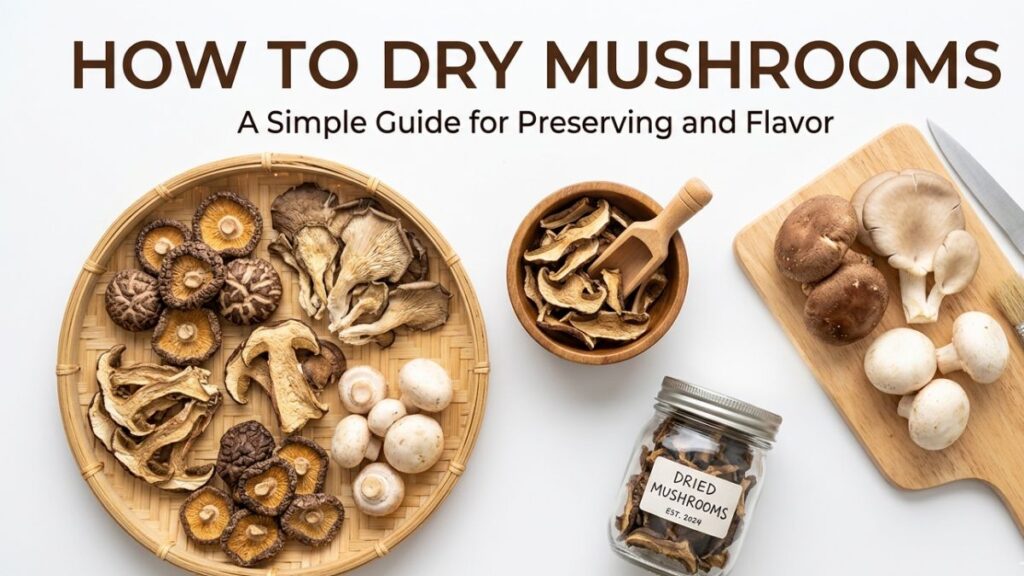
You come home with a big haul of mushrooms: a farmers’ market bargain, a grow bag that went wild, or a lucky day foraging. Then the clock starts. Fresh mushrooms turn slimy within days, and nobody can eat three pounds in a week. Learning how to dry mushrooms solves this. You lock in flavor for a year or more with equipment you probably already own. Below, you’ll find prep, three drying methods, storage, rehydrating, and a quick way to predict your final yield.
Why Drying Mushrooms Is Worth Your Time
Flavor That Gets Bolder
Drying removes water, and what’s left is concentrated. Shiitake turn smoky and deep. Porcini and morels become almost meaty. That’s why chefs reach for dried mushrooms when they want a broth, risotto, or sauce to taste like it simmered all day.
Less Waste, More Savings
- Fresh mushrooms last about a week in the fridge. Properly dried ones keep for a year or longer.
- A dried batch fits in a jar instead of crowding your shelf.
- You can buy in bulk or harvest a surplus without pressure.
- Small jars make great homemade gifts.
Which Mushrooms Dry Well (and Which Don’t)
Best Candidates
Firm, meaty mushrooms are the easiest:
- Shiitake
- Porcini
- Morels
- Oyster mushrooms
- Lion’s mane
- Cremini and button mushrooms
Handle With Care
Delicate or very watery types, such as chanterelles and enoki, can turn tough or fragile. Many cooks sauté and freeze them instead.
One firm rule: only dry mushrooms you’ve identified with complete certainty. Drying does not remove toxins. If you’re unsure about a wild mushroom, ask an experienced local forager or a mycological society before it goes anywhere near a tray.
Prep Work That Makes or Breaks Your Batch
Clean Without Soaking
Mushrooms soak up water like sponges, and extra moisture means longer drying and a duller result. Instead:
- Brush off dirt with a soft pastry brush.
- Wipe stubborn spots with a barely damp cloth.
- Trim the tough stem bases.
- Toss anything slimy, bruised, or full of bug holes.
Slice for Even Drying
Uneven pieces dry at different speeds, leaving you with some crisp slices and some still damp. Aim for about ¼ inch (6 mm) thick. Halve small mushrooms and slice larger ones lengthwise through the cap and stem. Shiitake stems are woody, so dry them separately and save them for stock.
Keep one thickness per tray. It makes the finish line much easier to judge.
How to Dry Mushrooms Step by Step
Method 1: How to Dehydrate Mushrooms at Home With a Dehydrator
This is the most reliable method, and the one I’d recommend if you dry mushrooms regularly.
- Preheat the dehydrator to 125–135°F (52–57°C).
- Arrange slices in a single layer with a little space between them for airflow.
- Dry for roughly 4–8 hours, depending on thickness and humidity.
- Start checking hourly after the third hour and rotate trays if your unit dries unevenly.
- Let the pieces cool for a few minutes before testing them. Warm mushrooms always feel softer than they really are.
Quick tip: Don’t crank the heat to save time. High temperatures harden the surface first and trap moisture inside, a problem called case hardening. That trapped moisture is what causes mold later.
Method 2: How to Dry Mushrooms Without a Dehydrator (Oven)
No dehydrator? Your oven works fine with a little babysitting.
- Set it to the lowest temperature, ideally 140–170°F (60–77°C).
- Place slices on wire racks set over baking sheets so air circulates underneath.
- Prop the door open slightly with a wooden spoon so moisture can escape.
- Flip the slices halfway through and check every 30 minutes.
- Expect 2–4 hours.
Many ovens bottom out at 170°F, which is hot enough to cook thin slices quickly. Watch closely near the end and pull pieces out as they finish.
Method 3: Air Drying
Air drying is the old-school approach. Thread slices onto a string with a needle, or spread them on mesh screens in a warm, dry, breezy room. Expect 2–4 days.
It works best in low humidity. In damp climates, mushrooms can spoil before they dry, so go with the dehydrator or oven. Keep them out of direct sun, which can fade the flavor. A small fan nearby speeds things up and keeps air moving.
How to Tell When Mushrooms Are Truly Dry
The Snap Test
Properly dried slices feel light and brittle, and they break with a clean snap. If a slice bends, feels leathery, or has any cool, soft spot in the middle, keep drying. When in doubt, give it another hour. Under-dried mushrooms are the number one cause of mold in storage.
Conditioning: The Step Most People Skip
Conditioning evens out leftover moisture across the batch:
- Let everything cool completely.
- Fill a glass jar about two-thirds full and seal it.
- Shake it once a day for about a week.
- If you see condensation on the glass, the batch needs more drying time.
It’s a week of waiting, but it can save a whole season’s work.
How to Store Dried Mushrooms Long Term
Pick the Right Container
Dried mushrooms have three enemies: moisture, light, and air. Protect against all three:
- Use airtight glass jars or vacuum-sealed bags.
- Store them somewhere cool, dark, and dry, such as a pantry shelf away from the stove.
- Add a food-grade oxygen absorber or silica packet for extra insurance.
- Never store them while still warm.
Shelf Life and Spoilage Checks
Label every jar with the mushroom type and date. For best flavor, use them within a year, though well-dried, well-stored mushrooms often last longer. Check jars now and then. Throw out any batch that smells musty, looks clumped, shows fuzzy growth, or has tiny holes or webbing, which signal pests.
If you’ve had pantry moths before, freeze the sealed jar for a few days before moving it to the shelf. It kills any hitchhikers.
Using Dried Mushrooms in the Kitchen
How to Rehydrate Dried Mushrooms
Rehydrating is easy, and the soaking liquid is worth saving.
- Cover the mushrooms with hot (not boiling) water.
- Weigh them down with a small plate so they stay submerged.
- Wait 20–30 minutes, until soft and pliable.
- Lift them out and gently squeeze.
- Strain the soaking liquid through a coffee filter to catch grit, then use it as a rich stock.
For soups and stews, skip the soak. Toss the dried pieces straight into the pot and they’ll soften as they simmer.
Make Your Own Mushroom Powder
Blitz fully dried slices in a blender or spice grinder until fine. A teaspoon stirred into gravy, scrambled eggs, pasta sauce, or a dry rub adds a savory punch. Store the powder airtight and use it within a few months, since it loses punch faster than whole slices.
Estimate Your Dried Yield Before You Start
Fresh mushrooms are mostly water. They typically lose around 85–90% of their weight when dried, so a kilogram of fresh mushrooms may leave you with only about 100–150 grams. The exact number varies by species and moisture level.
Want to avoid guesswork? Enter your fresh weight in the Mushroom Drying Yield Calculator to see roughly how much dried product to expect. It helps you pick the right jar sizes, plan your batches, and price your harvest if you sell.
Common Mistakes to Avoid
- Washing mushrooms under the tap
- Mixing thick and thin slices on one tray
- Overcrowding trays so air can’t move
- Using high heat to rush the process
- Skipping the conditioning week
- Sealing jars while mushrooms are still warm
FAQs
Can you dry mushrooms without a dehydrator?
Yes. An oven set to its lowest temperature with the door slightly open works well, and air drying works in dry, breezy conditions. Both just need closer monitoring than a dehydrator.
How long do dried mushrooms last?
Stored airtight in a cool, dark place, they stay at their best for about a year and often remain usable longer. Discard them if you notice mold, a musty smell, or signs of pests.
Do I need to wash mushrooms before drying?
No, and you shouldn’t soak them. Brush off dirt or use a barely damp cloth. Excess water slows drying and weakens flavor.
Why are my dried mushrooms still chewy?
They need more time. Slices that bend instead of snapping still hold moisture. Return them to the dehydrator or oven until they turn crisp, then condition them in a jar before storing.
Conclusion
Drying mushrooms is one of the easiest ways to keep a harvest from going to waste, and it turns an ordinary pantry into something far more flavorful. Slice evenly, dry low and slow, check for that clean snap, and condition before storing. Do those four things and your jars will last all year.