You bought a spore syringe, waited weeks for your grain jar to colonize, and then watched a patch of green mold take over. If that sounds familiar, you’re not alone. Slow, unpredictable mycelium is the main reason beginners give up on growing mushrooms. The fix is simpler than most people think. DIY mushroom liquid culture at home takes about 30 minutes of hands-on work and costs just a few dollars. It gives you a living supply of mycelium that colonizes grain much faster than spores alone. This guide covers the exact method, the mistakes that ruin most batches, and how to tell when your culture is healthy.
What Is Liquid Culture (and Why Do Growers Swear By It)?
Mycelium in a Jar
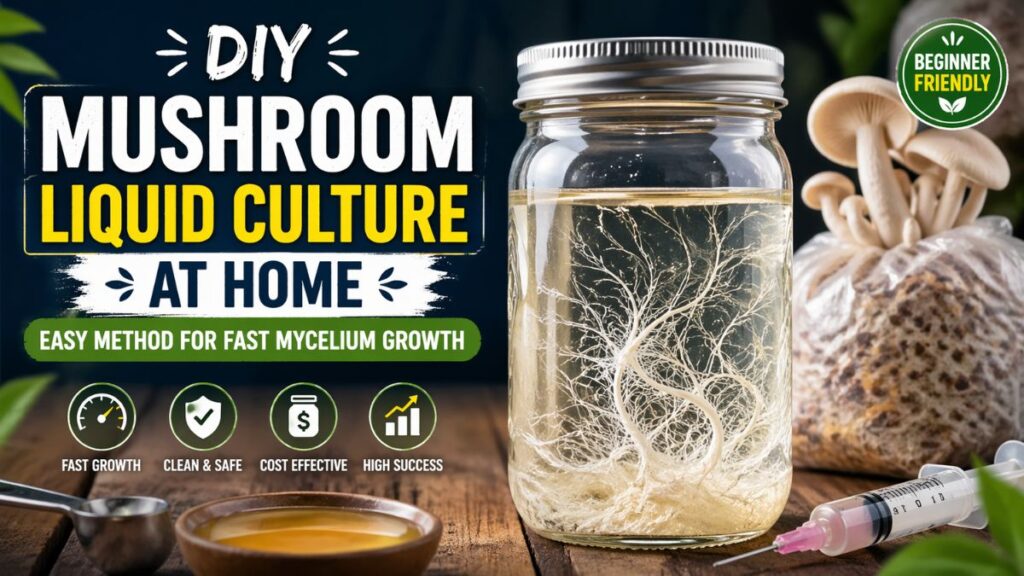
Liquid culture (often shortened to “LC”) is mycelium suspended in a sterilized, nutrient-rich liquid. Think of it as a starter, like sourdough, but for mushrooms. Instead of waiting for spores to germinate, you inject living, actively growing mycelium straight into grain or substrate.
Mycelium is the root-like network that eventually produces mushrooms. Put it in liquid, and it spreads in every direction instead of crawling slowly across a solid surface.
Liquid Culture vs. Spores vs. Agar
Here’s how the three most common starting methods compare:
- Spore syringes: cheap and easy to find, but slow and genetically unpredictable
- Agar plates: excellent for selecting strong, clean mycelium, but they take more skill and equipment
- Liquid culture: fast, easy to scale, and great for inoculating many jars from one source
Many experienced growers start on agar, then expand into liquid culture. Beginners can skip straight to LC using a spore syringe or a purchased culture.
Why DIY Mushroom Liquid Culture at Home Is Worth Trying
Faster Colonization
Mycelium from liquid culture often colonizes a grain jar in two to three weeks, depending on species and temperature. Spores can take noticeably longer, and some never take off at all. That time difference adds up fast if you’re growing several batches.
Lower Cost, More Control
A single jar of liquid culture can inoculate dozens of grain jars. You make it from pantry-level ingredients, so you aren’t paying for a new syringe every time. You also control the whole process, which means you can spot problems early instead of guessing.
What You’ll Need Before You Start
The Equipment List
You don’t need a lab. Here’s a realistic starter kit:
- Glass jars with metal lids (mason jars or media bottles)
- A pressure cooker or canner that reaches 15 psi
- Light malt extract or honey as the sugar source
- Clean water (filtered or distilled works best)
- A spore syringe, agar wedge, or existing culture
- Rubbing alcohol (70%) and a lighter or alcohol burner
- Aluminum foil and a few clean paper towels
- Optional: a magnetic stir bar and a self-healing injection port or filter patch for the lid
Choosing a Beginner-Friendly Species
Oyster mushrooms are the easiest place to start. They’re fast, forgiving, and grow aggressively. Lion’s mane and shiitake also work well in liquid culture. Whatever you choose, check your local laws first, since rules vary by region and species.
A Simple Mushroom Liquid Culture Recipe
Plenty of recipes exist, but the best one for beginners is the simplest. Fancy mixes add more ways for things to go wrong.
The Ingredients and Ratio
A reliable mushroom liquid culture recipe uses:
- 500 ml (about 2 cups) of clean water
- 10–20 g of light malt extract or honey (roughly 2–4 teaspoons)
That’s a sugar concentration of about 2–4%. More isn’t better. A syrupy mix can slow growth and make contamination more likely. Use light malt extract or light honey, since dark varieties can leave debris and make it harder to read your culture.
Mixing It Right
Stir until the sugar fully dissolves. Pour the mixture into your jar, filling it to about 60–70% capacity. The extra air space matters because mycelium needs oxygen to grow. If you’re using a stir bar, drop it in now.
Cover the lid’s hole with foil, or fit a filter patch or injection port. Close the lid loosely if you’re sterilizing with a cooker, since pressure needs somewhere to equalize.
How to Sterilize Liquid Culture Jars
This is the step that decides whether your batch lives or dies. If you remember only one section of this guide, make it this one.
The Pressure Cooker Method
- Place a rack or folded towel at the bottom of the cooker so jars don’t touch direct heat.
- Add water according to your cooker’s instructions.
- Set the jars inside, with lids loose and foil on top.
- Bring to 15 psi and hold it for 20–30 minutes.
- Turn off the heat and let the pressure drop on its own.
Never force-release the pressure. A sudden drop can make the liquid boil over or crack the jars. Always follow your cooker’s manufacturer instructions.
Cool Down Completely
Once the jars come out, let them cool to room temperature before inoculating. This usually takes several hours. Injecting mycelium into hot liquid will kill it. Tighten the lids only after the jars have cooled.
If you want a deeper look at the sterilization step, how to sterilize liquid culture jars properly is the most-searched question among new growers, and the answer is always the same: pressure, time, and patience.
Inoculating Your Jar, Step by Step
Prepare a Clean Workspace
You don’t need a fancy flow hood. A still, clean room works. Here’s a quick prep routine:
- Turn off fans and close windows for 15 minutes
- Wipe the table and your hands with 70% alcohol
- Wash and dry your hands, then wipe again
- Sterilize the syringe needle by flaming it until red hot, then letting it cool for a few seconds
Inject the Culture
Wipe the injection port or lid with alcohol. Insert the needle and inject 1–2 ml of spore solution or culture. If you’re using an agar wedge, transfer a small piece into the jar near a flame, then close the lid quickly.
Label the jar with the species and date. You’ll thank yourself later when you have five jars on a shelf and can’t remember which is which.
Incubation: What to Expect Week by Week
Keep It Warm and Shake It
Store the jar at 70–78°F (21–26°C), out of direct sunlight. Shake it gently once a day. This breaks up clumps of mycelium and spreads them through the liquid, so growth happens everywhere instead of in one spot.
A typical timeline looks like this:
- Days 1–4: the liquid stays clear, and nothing seems to happen
- Days 5–10: tiny white wisps or fuzzy clouds appear
- Days 10–14: you’ll see cotton-like clusters floating through amber liquid
Spore-started jars usually take a bit longer than jars started from existing culture.
How to Tell If Liquid Culture Is Contaminated
Knowing how to tell if liquid culture is contaminated saves you from wasting grain, time, and effort. Healthy culture looks like this:
- Clear to light amber liquid
- White, stringy, or cloud-like mycelium
- A mild, earthy, or slightly sweet smell
Throw it out if you notice any of these:
- Cloudy, milky liquid that gets thicker over time
- Sour, rotten, or “yeast-like” smells
- Slimy films on the surface
- Green, black, or pink spots
When in doubt, don’t use it. One contaminated jar can ruin an entire batch of grain.
Using and Storing Your Liquid Culture
Inoculating Grain Spawn
Once your jar is full of mycelium, shake it well and draw it up with a sterile syringe. Using liquid culture for mushroom grain spawn is where the speed advantage really shows. A common starting point is 5–10 ml per quart-sized grain jar, though the ideal amount depends on your jar size and grain type.
To avoid guesswork, plug your numbers into this Liquid Culture Calculator. It helps you work out water, sugar, and inoculation amounts so every batch is consistent.
Storing It Properly
Keep your finished culture in the refrigerator, where growth slows way down. Most growers use it within a few months, though it may stay viable longer. Let a chilled jar warm to room temperature and give it a shake before drawing from it. Always flame-sterilize your needle before each use.
Common Mistakes (and Easy Fixes)
Even careful beginners slip up. Watch out for these:
- Skipping the cooldown: hot liquid kills mycelium
- Too much sugar: it feeds contaminants as well as mycelium
- Overfilling jars: mycelium needs air
- Rushing sterilization: under-processing is the number one cause of failure
- Opening jars too often: every opening is a contamination risk
Most failures trace back to one of these five habits. Fix them, and your success rate jumps dramatically.
Frequently Asked Questions
How long does liquid culture take to grow?
Most cultures show visible growth in 5–10 days and are ready to use in about 10–14 days at room temperature. Species, temperature, and starting material all affect timing.
Can I use honey instead of malt extract?
Yes. Honey works well for many species, and it’s a popular choice among beginners. Use a light variety and keep the concentration low. Light malt extract tends to give more consistent results.
Why is my liquid culture cloudy?
A little haziness can be normal as mycelium spreads. But thick, milky liquid with a sour smell usually means bacterial contamination. If your culture smells off, discard it.
How long does liquid culture last in the fridge?
Properly stored, it can stay usable for several months. The fresher it is, the faster it tends to colonize, so try to use it while it’s still vigorous.
Conclusion
Growing mushrooms feels intimidating until you realize it’s mostly about cleanliness, patience, and a few simple habits. With the right recipe, careful sterilization, and a little daily shaking, you can have a thriving jar of mycelium in about two weeks. Start small, with one jar and one species, and write down what you do so you can improve each round.