
You transferred a small piece of mushroom tissue onto a plate, waited a week, and found either nothing or a fuzzy green patch where your culture should be. That usually isn’t a problem with the mushroom. It’s the agar underneath it.
The perfect mushroom agar recipe doesn’t need lab-grade supplies. It needs a handful of simple ingredients, a pressure cooker, and a few clean habits. Below, you’ll learn how to make mushroom agar at home, which ingredients matter, and the small mistakes that quietly slow growth.
Why Agar Is the Secret Behind Healthy Mycelium
What Agar Actually Does
Agar comes from seaweed and sets into a firm, clear gel. Mycelium can’t digest it, and that’s the point. The gel holds water and nutrients in place while the fungus feeds on whatever you’ve mixed in, usually malt.
Because the surface is flat and transparent, you can see everything happening. That lets you:
- Spot contamination early
- Pick the healthiest, fastest-growing section to transfer
- Keep a strong culture alive for months
Why Recipe Quality Affects Growth Speed
Mycelium is picky about balance.
- Too little food: growth turns thin, wispy, and slow.
- Too much sugar: bacteria and yeast take off before your culture does.
- Too soft a gel: moisture pools on top and invites contamination.
Get the balance right and many common culinary species, like oyster mushrooms, can colonize a plate in roughly one to two weeks. The exact timing depends on the species, temperature, and how clean your technique is.
What You Need Before You Start
Ingredients (Makes About 1 Liter)
- 20 g agar-agar powder (food or lab grade)
- 20 g light dry malt extract (DME)
- 1 liter distilled or filtered water
- Optional: 1–2 g yeast extract for fussier species
This is the foundation of malt extract agar for mushrooms. It’s popular because it’s cheap, forgiving, and works for most gourmet species.
Equipment
- Pressure cooker or canner that reaches 15 psi
- Heat-safe glass jar or flask, with foil or a loosened lid
- Sterile 100 mm petri dishes (a liter fills roughly 40–50)
- Kitchen scale that reads in grams
- 70% isopropyl alcohol and a clean cloth
- Gloves
- A still air box or flow hood for pouring
- Parafilm or surgical tape for sealing
A Quick Cleanliness Checklist
Most failed plates are lost before the agar even cools. Before you start:
- Turn off fans and close windows
- Wipe your workspace and gloves with alcohol
- Tie back long hair and wash your hands
- Prepare everything first so you’re not hunting for tools mid-pour
The Perfect Mushroom Agar Recipe (Step by Step)
Here’s the full process for how to make mushroom agar at home, from powder to poured plates.
Step 1: Mix the Ingredients
Add the water to your jar first, then the malt extract and agar. Stir until the malt dissolves. Agar won’t fully dissolve until it’s heated, and that’s fine. Don’t fill the jar more than about two-thirds full, because it bubbles during sterilization.
Step 2: Cover the Jar
Cover the mouth loosely with foil, or use a lid that’s loosened a quarter turn. Pressure needs a way to equalize, and a sealed jar can crack or burst.
Step 3: Sterilize in the Pressure Cooker
Pressure cooker agar sterilization is the step that protects everything else. Place the jar on a rack with a few centimeters of water in the bottom of the cooker. Bring it to 15 psi and hold for about 30 minutes. Larger volumes may need a little longer.
When time is up, turn off the heat and let the pressure drop on its own. Never open the cooker while it’s pressurized. Hot agar can scald.
Step 4: Cool to Pouring Temperature
Carefully remove the jar and swirl it gently to mix. Let it cool until it’s comfortably hot to the touch, around 50–60°C (120–140°F). It should still pour easily. If it’s too hot, steam condenses inside the dishes. If it’s too cool, it starts to set in the jar.
Step 5: Pour the Plates
Inside your still air box or flow hood:
- Lift the lid of each dish just enough to pour
- Add roughly 20 ml per 100 mm dish, enough for a thin, even layer
- Close the lid right away
- Let the plates sit undisturbed until fully set, about 30–60 minutes
Step 6: Store Your Plates
Once set, flip the plates upside down so condensation doesn’t drip onto the surface. Seal them in a clean bag or wrap them with parafilm. Stored in the fridge, agar plates for mushroom cultivation typically stay usable for several weeks. For the cleanest results, let them sit at room temperature for a few days first. Any contamination will show up, and you can throw those plates out before they cost you a precious culture.
Tweaks That Help Mycelium Grow Faster
Match the Agar to the Species
Malt extract works for many species, but some prefer different nutrition.
- Oyster and lion’s mane: usually happy on standard malt agar.
- Shiitake and reishi: may do better with a little yeast extract.
- Potato dextrose agar (PDA): a common alternative. Some growers find certain species colonize it faster, though results vary.
If a culture seems sluggish, trying a second recipe is cheap and often revealing.
Keep the Nutrients Balanced
More food doesn’t mean faster growth. A heavier mix can produce rope-like, dense mycelium in some species and gives bacteria more to feed on. Stick to roughly 1–2% malt, then adjust one variable at a time so you know what actually made the difference.
Dial In Temperature and Airflow
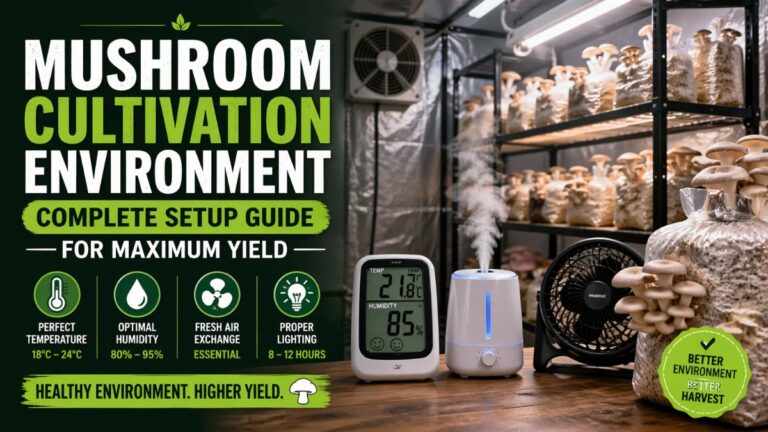
Most popular culinary species do well around 22–26°C (72–78°F). Keep plates in a dark, steady spot away from heaters and drafts. Check them daily, but don’t open them more than you need to. Every opening is a chance for spores to land.
Common Problems (and Quick Fixes)
Bacterial Contamination
Bacteria often look slimy, wet, or shiny, and they may smell sour. They tend to follow the line where your transfer tool touched the agar.
Fix: Work faster and cleaner, and check that your agar is fully sterilized. Don’t skip the rest period before use. A day or two at room temperature will reveal bad plates.
Green or Black Mold
Fuzzy green, black, or grey patches usually mean airborne mold spores got in during pouring or transfer, often because of drafts or reused tools.
Fix: Pour in a still air box, wipe everything down, and avoid moving around while plates are open. Discard contaminated plates without opening them.
Slow or Sparse Growth
If your mycelium looks faint, thin, or stalled, consider these causes:
- Culture is old or stressed
- Incubation temperature is too low
- Agar is too thin or too nutrient-poor
- Water quality is poor (use distilled or filtered)
Plates That Sweat or Won’t Set
Excess moisture on the lid means you poured too hot. Plates that stay soft mean too little agar, or the mix wasn’t sterilized long enough to fully activate it.
Fix: Cool the agar a bit longer before pouring, and double-check your measurements.
Scaling Your Batch Without Guesswork
Making one liter is easy. Scaling up for a dozen plates, or down for just a few, is where small math errors creep in.
If you’d rather skip the conversions, the Mushroom Agar Recipe Calculator can work out the ingredient amounts for the batch size you want. It’s handy when you’re testing a new recipe or trying not to waste agar.
Whichever way you scale, write down every batch: ingredient weights, sterilization time, and how the culture performed. After a few rounds, you’ll have a recipe tuned to your setup instead of someone else’s.
FAQs
How long does it take mycelium to grow on agar?
It depends on the species, temperature, and the health of the culture. Fast growers like oyster mushrooms may cover a plate in about one to two weeks under good conditions. Slower species can take several weeks.
Can I make mushroom agar without a pressure cooker?
You can use a stovetop method or microwave for rough prep, but a pressure cooker is far more reliable. Boiling at normal pressure doesn’t reach temperatures high enough to reliably kill bacterial spores, which is why homemade plates often contaminate.
What is the best agar for mushrooms?
Malt extract agar is a favorite for beginners because it’s inexpensive and works for many gourmet species. Potato dextrose agar is another common option. The best choice depends on the species you’re growing.
How long do agar plates last?
Poured and sealed plates generally keep for several weeks in the fridge. Check each plate for cloudiness, odd spots, or dryness before using it.
Conclusion
A great culture starts long before the mushrooms appear. With the right balance of malt, agar, and water, and careful sterilization and clean pouring, your mycelium gets exactly what it needs to spread fast and healthy.